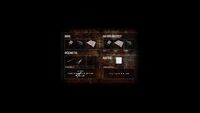
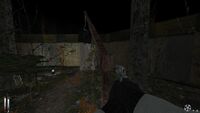
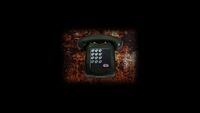
This is a list of the puzzles that can be found throughout Cry of Fear.
Coded Padlock
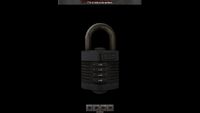
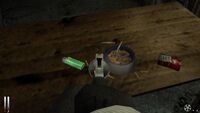
In the very first level, escape is blocked by a padlock, locked with a combination code. The player must head towards the Town Square and retrieve a username and password for a computer in a nearby cafe. Once unlocked, the computer reveals the code for the padlock.
This puzzle was added into the game to stop players simply googling the combination to the padlock and bypassing the area entirely, as the team put a lot of effort into designing the town square area, and wanted players to enjoy the effort they went to in crafting the map, and designing the church. The username and password are pre-picked randomly from one of 32 possible options (16 usernames and 16 passwords), and an algorithm then generates the final code, meaning it will be different on every play-through.
Apartments Exit Elevator
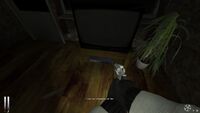
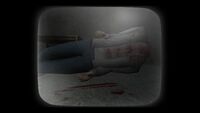
After entering the apartments to help the unknown caller, and finding him dead, Simon's objective switches to escaping the apartments. Firstly, Simon retrieves the basement key, floating in the water next to the corpse, and uses it to gain access to the basement, which is locked. In the basement, Simon retrieves a videotape and must head back to the predator's apartment to play it. Upon playing the tape, Simon will be greeted by a video of the predator decapitating an individual with a pair of gardening sheers. The decapitated body falls onto the floor, and the camera pans over to the front, revealing the exit code for the elevator. As with the padlock, the code is randomized on every play-through (although the final digit is always 9) to prevent the area being bypassed.
Newspaper Phone Code
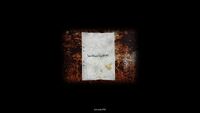
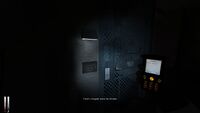
Around the start of Chapter 2, Simon find his progress blocked by a door with a keypad. Simon has to find a ripped newspaper nearby, which presents him with a phone number: 543-214. To call the number, equip the Mobile Phone and press the Weapon Option button (default Z).
During a cryptic and unnerving dialogue, the mysterious call recipient provides Simon with a code: 5247. Enter the code into the keypad to proceed.
- The code is not randomized, and as such the entire puzzle can be skipped by directly entering 5247 into the keypad.
Sewer Maintenance Door
Descending down a broken ladder, Simon finds himself in a cave area. In one of the rooms Simon finds a written note detailing the keypad code to be 279█, with the last digit smudged out. The first three digits are always the same, but the last digit is randomized and so the player has to brute force it.
Behind the door, Simon eventually finds a shotgun and a lighter. The lighter is to be used on trail of oil in the same room where the door code was found. This burns through a rope holding a door shut, allowing Simon to retrieve the exit key.
Mace
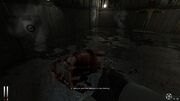
Mace is dead, now to get the key
After unlocking the door to the maintenance area, Simon immediately faces another puzzle, this time after seeing Doctor Purnell decapitate a person (apparently after demanding the exit key), Simon sees Mace swallow the exit key the doctor was referring to. Simon must use nearby cranks to electrify the water and damage mace. After damaging mace, Simon must retrieve a saw and cut Mace open, retrieving the exit key that Mace swallowed. The exit key in fact leads Simon to another nightmare sequence, however once the nightmare sequence completes, he escapes the sewers for good.
Park Statue Puzzle
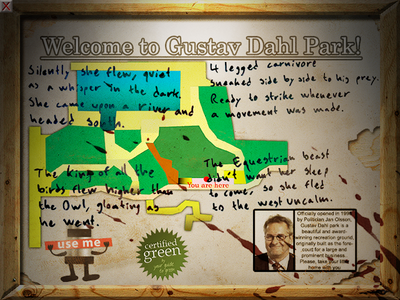
Map of the park with the clue written on it
In Gustav-Dahl Park, Simon is faced with a puzzle that requires him to follow a written clue to move four animal statues to their correct positions. Doing so will unlock the maintenance shed and allow Simon to retrieve the exit key, as well as the Hunting Rifle.
| Silently she flew, quiet as a whisper in the dark. She came upon a river and headed south. |
4 legged carnivore sneaked side by side to his prey. Ready to strike whenever a movement was made. |
| The king of all the birds flew higher than the Owl, gloating as he went. |
The Equestrian beast didn't want her sleep to come, so she fled to the west uncalm. |
The puzzle is not randomized and the solution is the same every time:
- Eagle: → right, ↑ up
- Owl: ↓ down
- Horse: ↑ up, ← left
- Lion: ← left, ← left
Saxon Avenue Subway Puzzle
After retrieving the fuse from Harbor College, Simon enters Saxon Avenue train station, only to find that the trains are out of action. Instead, he must access the subway's service tunnels and head towards Hansson Square station, one of the main transport hubs on the Subways. However a Human Flower blocks the path. Simon must enter a control room and hit 2 sliding levers to unlock 2 doors, both on a timer. Simon must then sprint across the station platform to the other control room before the door times out and re locks itself. This allows him to activate one of the trains, which destroys the human flower and allows him to pass.
Nightmare Sequence Door Puzzle
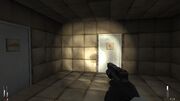
The doors
After exiting the corridors, Simon finds himself in a room with 4 doors and a note on the ground, which reads:
| That fateful night, the child lay upon the road, broken. Why did you have to walk that way so late, young man? Why did you have to be so foolish?" Disillusioned and embittered by his parents' words, the child was broken physically, broken mentally. |
The note refers to The Black Day and hints to the player to choose the four doors in the correct order: Car → Wheelchair → Pistol → Book.
- The latin quote translates to "According to the capabilities of the reader, books have their destiny."
"You Will Not Survive" Nightmare Sequence
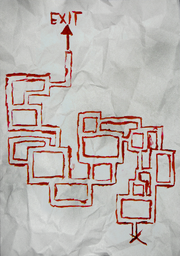
Map of the maze.
Immediately after solving the previous puzzle, Simon is presented with a maze that he has to navigate while avoiding Hangmen - enemies that move around the labyrinth on ceiling tracks and instantly kill the player on touch. Maps can occasionally found hanging on maze walls, showing the general layout and the player's current location.
The challenge appears daunting, but the maze can be easily solved by hugging the right wall, and Hangmen can be outpaced with walking speed, as long as the player is not out of stamina.
Escape From The Crashed Train
Don't get vertigo...
After finally retrieving the fuses and boarding the train to Norcastle, Simon thinks he's finally on his way home, however, naturally, nothing is ever that easy. The train goes over a bridge, however the bridge has collapsed and the rail is bent. The train derails and Simon's carriage is left dangling perilously over the edge. Using the Half-Life engine's somewhat quirky jumping mechanics, the player must escape the carriage by performing a vertical platforming challenge, and escape the carriage before it plummets over the bridge.
The Forest TV Challenge
After navigating his way through the outer forest, Simon escapes from a dilapidated house into a dark area with practically no natural light, and nothing more than a couple of lanterns to show the way. The exit door is blocked by a crate, above which hangs a TV (with the words "Drop Me" shown on the screen). Simon must search more dilapidated buildings that are nearby, and find 2 halves of a pair of scissors. After being combined, the scissors can be used to cut the rope, and the TV drops onto the crate, destroying it and clearing the way.
Asylum Generator
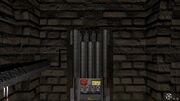
Generator puzzle
After escaping the forest, Simon enters the Asylum, only to find out the power is down. Simon heads to the basement to restart the generator, and is faced with a puzzle which requires him to have all five control rods in the down position at the same time. This puzzle is not randomized, and can be easily solved by pressing each of the four buttons once in any order, such as AB, BC, CD, DE.
The Asylum Attic Code
In the Asylum, after either giving the Doctor the gun or refusing to do so, Simon gains access to a room with a phone, a telescope, and the Asylum Staff Room Key. The key can be used to unlock a room on the second floor, where Simon eventually finds the Left Half of a Number Plate. As Simon exits the staff room, a door in front of him is broken down by a Psycho, allowing Simon to climb out the window and take a fire escape ladder to the ground floor, where the Right Half of a Number Plate is found.
Combining the two halves, Simon is presented with a phone number in roman numerals. Dialing the number from the phone room causes the window opposite to light up, and looking through a telescope reveals a wheelchair-bound person with their face obscured, holding up a board with a four digit code. The code is to be entered into the keypad by the attic door.
- The phone number is chosen from three possible options:
- 511-738-96
- 511-739-79
- 511-778-16
- The four digit code is fully randomized and not possible to brute force, as that would skip the doctor interaction.
- Note that the correct phone number can be dialed no sooner than entering the staff room and spawning the first half of the number plate, otherwise the call will not connect.
Trivia
- After battling the doctor and exiting the daytime version of the asylum, it is possible to use a gravity cheat to access the window Sick Simon was occupying, although the room is now empty.
- The phone number in the asylum neither has an area code nor an international dialling code, or an extension code just a phone number (E.G. 51177816). In reality, it is likely that in an asylum as large as this that the departments would be linked by IP Phones simply requiring the dialling of an extension, or even connecting you to the other department at the push of a quick call button.
- As the corpse in the bath wears similar clothing, it is almost certain that the Unknown Caller, The Apartment Predator, and the corpse in the bathtub on the 4th floor are in fact the same person. Although the suicide is never explained in game, a large hint is given by the fact that a bottle of Interfectum painkillers are sitting on the side of the bath, near the body. This, however raises further questions. The apartment predator's actual apartment is clearly the apartment on the second floor with the cassette player, however he is found dead in an apartment on the 4th floor.
- The puzzle with Mace was never originally intended to be part of Cry of Fear. It was added after a suggestion by someone ruMpel was attending college with at the time. Although ruMpel revealed in the game's developer commentary that he is not satisfied with the way this section of the game pans out, reaction from fans has not been so negative.
| Game | |
|---|---|
| Campaigns | Cry of Fear • Doctor's Story • Co-op • Manhunt • Suicide Maps • Custom Campaigns |
| Gameplay | Depression Helpline • Nightmare Sequences • Puzzles • Tape Recorder • Unlockables • Game Statistics |
| Misc | The Black Day • Cut Content • Easter Eggs • Notes • Soundtrack • Team Psykskallar |

